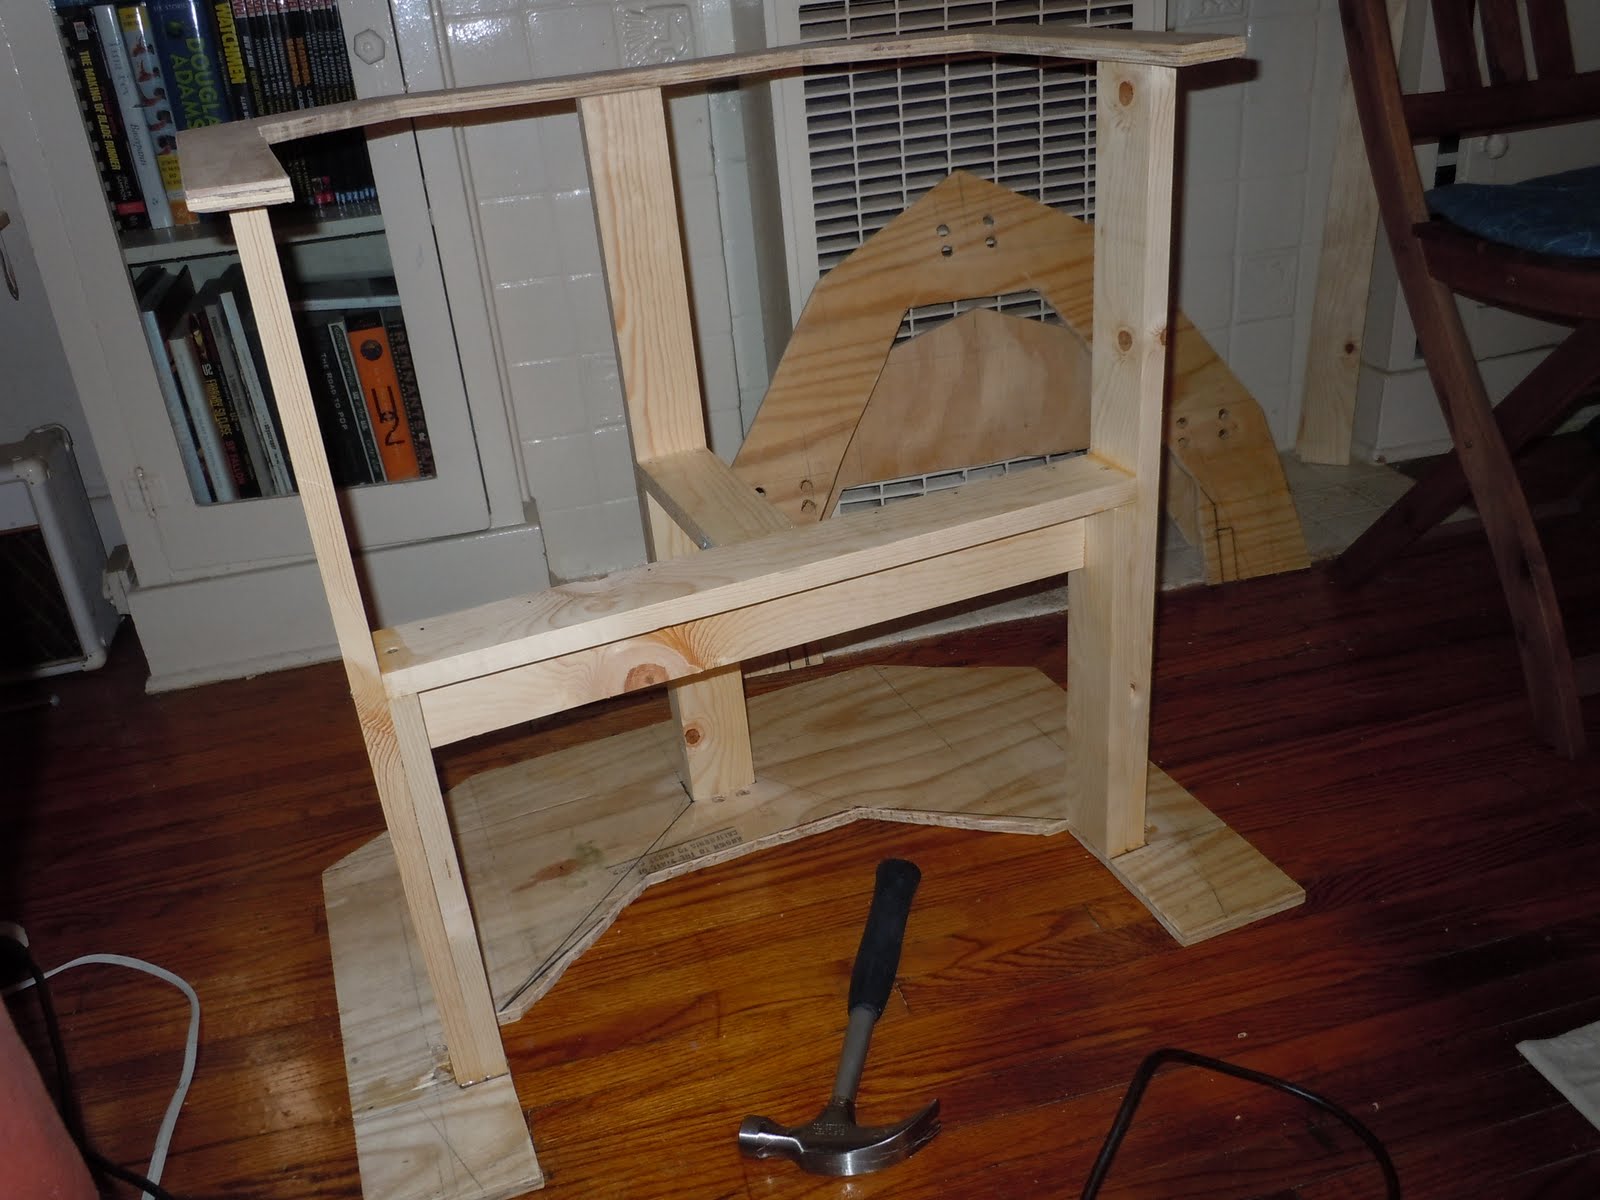
Wednesday, August 31, 2011

Shoulder Work

I'm taking a break from the skirt while I sort out the issue with the holes in the panels for the hemispheres, so I decided to move on to the shoulder section, and get some work done on that since I had the parts for it handy.

Here's the frame -


The top is a 22" diameter circle, about 2" wide. Should be enough to hold the neck rings and the inner neck bin (which I'll get to later). The bottom is the same pattern as the top of the skirt frame, but with the corners rounded off.

I cut the top and bottom out of 1/4" pressboard-like material. I forget exactly what it's called, but it seems pretty strong for its thickness. I had originally planned on using it for the skirt panels and the skin for the shoulder frame, but decided to go with the MDF instead for those. The struts are the same timber pieces I used for the skirt frame, just cut down in width to fit.

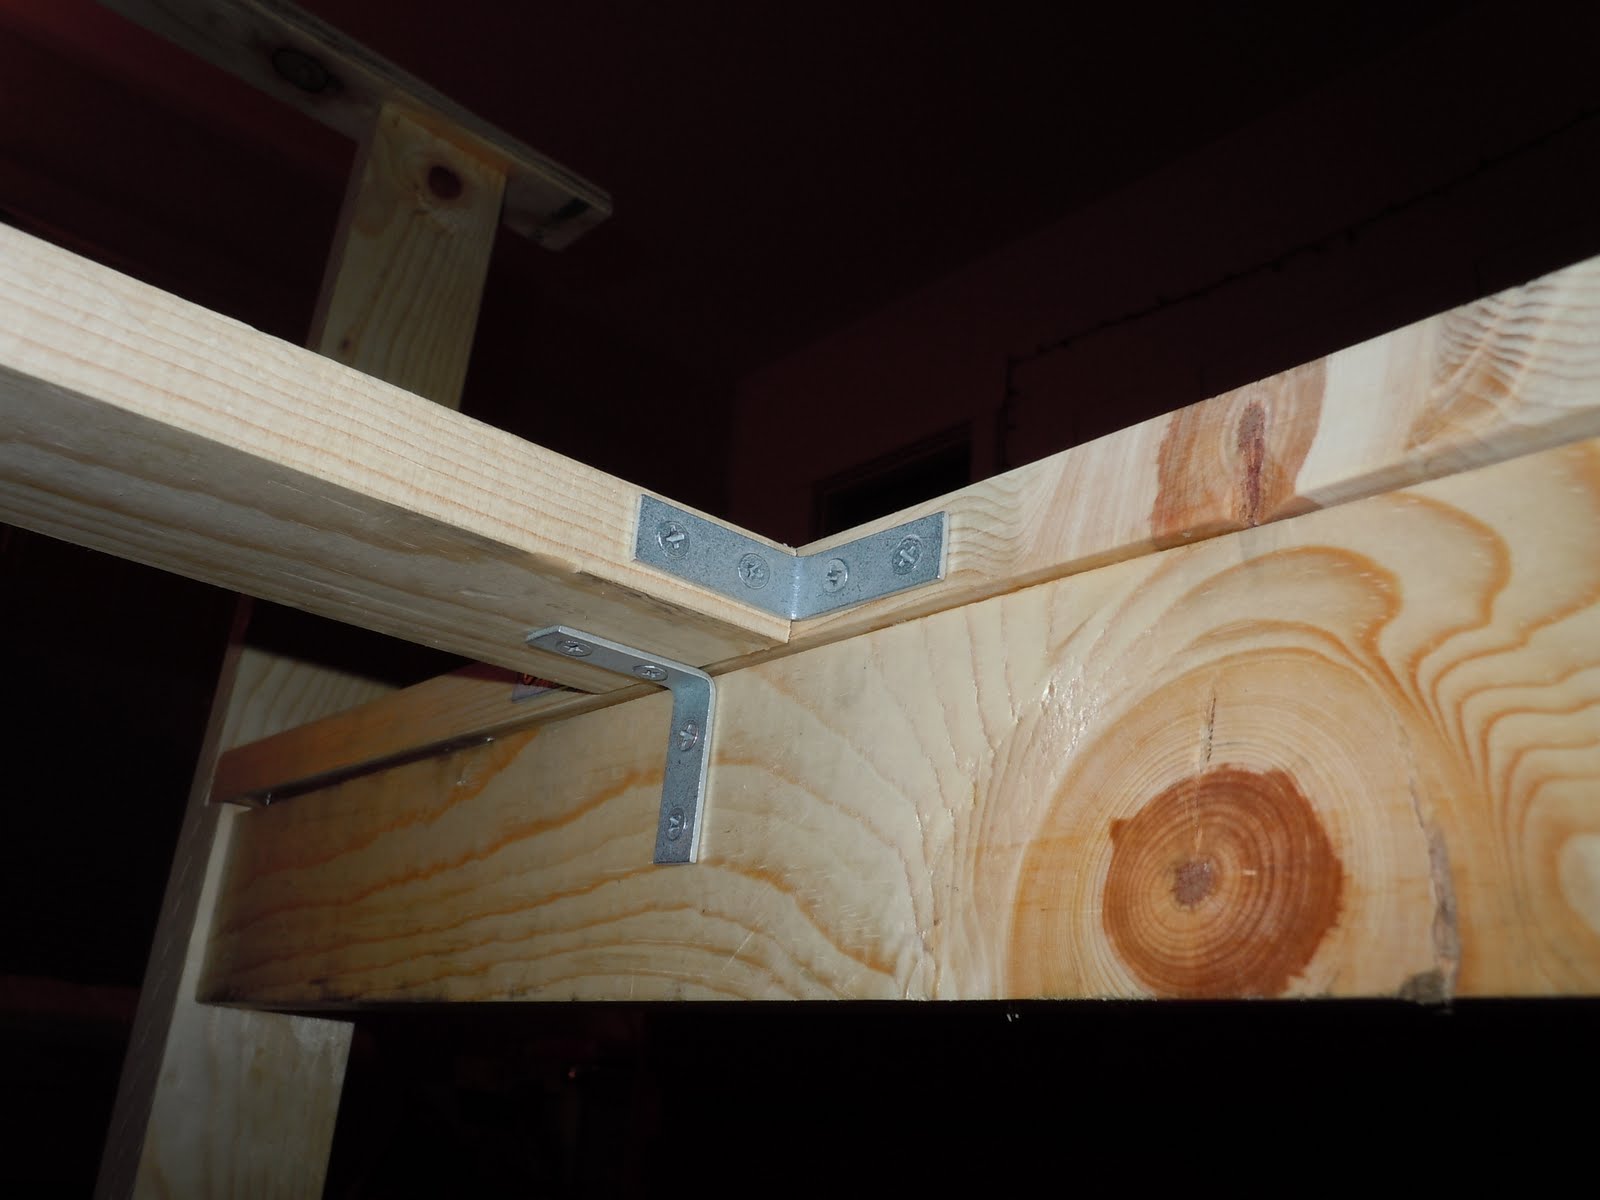
Here it is sitting on the skirt frame -


Next step will be to make the gun box, and then to put the "skin" around the frame.

Wednesday, August 24, 2011

Foiled by the Metric System!

It turns out the 4" hemispheres I got are not in fact 4" as advertised. They're a little bit over 4", and I'm assuming were measured in millimeters... So they are slightly too big for the holes I drilled... oops... Anyway, guess I've got some trimming to do.

56 4" disc cutouts.

Tuesday, August 23, 2011

Holes!


Just finished drilling the 56 4" holes in the skirt panels for the hemispheres.
I cheated a little bit and only measured the locations for each hole on one side of the skirt and the clamped the corresponding panel from the opposite side to each and drilled straight through - so I did 2 panels at a time. Except for the back panel obviously...


And here they are leaning in position against the skirt frame again.


Now on to those hemispheres!!

Sunday, August 21, 2011

More Skirt Panels

Spent the evening cutting out the rest of the skirt panels and then trimming the edges and sanding them to fit. It looks like they'll line up right once they're nailed and glued into place. They're just sort of leaning in place in these photos.


I still have to cut out the holes in each panel for the hemispheres first though. I'm also trying to decide if I should paint the panels before or after attaching them.

Friday, August 19, 2011

Dalek Bumps!

"They're etheric beam locators."

The hemispheres I'm going to use for the skirt arrived today! I don't really have the time or space (or patience) to make them myself with a mold so I got these from Barnard Ltd.


They should push through the holes I'm going drill in the skirt panels nicely.

Tuesday, August 16, 2011

Skirt Panels

Started cutting out the skirt panels today.


I'm using 1/8" MDF for these to keep the weight down a little bit. It's also much easier to cut.

Going to get them all cut out and make sure they fit properly and then cut the holes for the hemispheres. Planning on putting the hemispheres in before permanently attaching the panels to the skirt because the struts will be in the way if I try to do it later.

Tuesday, August 9, 2011

More Wheels

I decided to add two more wheels to the bottom after a brief "test drive" of the skirt section. I tried to place the wheels wherever there was more weight on the bottom, like under the vertical supports (which also have the seat attached.) It ended up being a bit wobbly at the back and moving in reverse felt a little tough. It's a lot smoother now.


Also painted the bumper. It's a little thinner than it should be I think, but I'm going to look for some sort of rubber maybe to put around it anyway.


Thursday, August 4, 2011

Dalek Skirt, part 5

Wheels...


...and the mostly complete skirt frame (still need to put the seat panel in. and some sort of latch to keep the parts together)


Wednesday, August 3, 2011

Dalek Skirt, part 4

I got quite a bit done today!

Here's the lower layer of the base with the trim attached with nails and wood glue (and lots of spackle to fill in cracks and gaps and make things look smoother.


Got some work done on the upper part of the skirt as well.


Just wanted to make sure the supports for the seat were sturdy...


and here it is with the front half.


Still need to cut the front strut and stick it in there. Also need to put a sheet of plywood in for the seat.
I think this might actually work out!


Tuesday, August 2, 2011

Brendan vs. The Feet-hole

Finally finished cutting out the hole in the lower part of the base. It was extra tricky because there's no easy way in with a hand saw. So I drilled holes around the edges and then hacked away at the smaller bits that were left until i could basically punch out the middle (and then sanded the edges).


Did I mention I'm making the bottom part of the base in 2 parts? I need the base to split for transportation reasons (and I suspect this will make it easier to get in and out of). But rather than use one REALLY thick piece of plywood or MDF for the bottom, I'm using 2 pieces  of 1/2" (well, a little over 1/2" - it's in millimeters, but i forget how many exactly... anyway) to make the bottom about 1" thick with the wheels and trim attached to the bottom layer, and the top layer split for attaching the rest of the skirt.

My big reasons for this:

 1. thinner pieces of wood to cut - remember, no power saw (I really should have just saved up for one of those)
 2. just seems like it would be more stable with the split
 3. if at some point I want to make the bigger MK2 base with larger wheels for outdoor use/invasion, I can just make that separately and pop the existing skirt on it.