 |
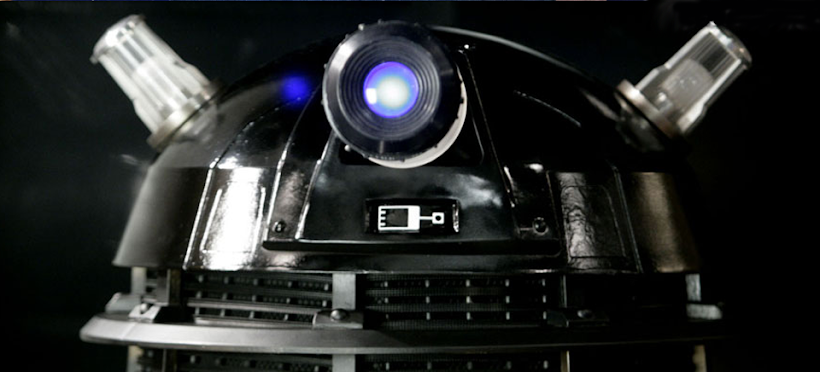
| One reasonably accurate 1963 Mk1 Dalek (with a few minor modifications). |
Thursday, January 26, 2012
Wednesday, January 25, 2012
The Dome
The dome itself is supposed to be made out of fiberglass. All the materials are readily available at Home Depot and aren't that expensive. While it doesn't look that difficult, I've never done it before and just don't feel comfortable experimenting with that on my own. Also, as I think I've mentioned before, I'm building this thing in my tiny studio apartment. There's just no way I could do that in here anyway.
So I needed an alternative material that didn't involve using toxic chemicals near where I sleep. I decided to give it a try with paper mache. I've had quite a bit of experience making large and ridiculous things out of paper mache, and have gotten pretty good at it. I was pretty confident that with enough layers, I could make the dome strong and smooth enough, and that it would at least work as a temporary solution until I work up the nerve (and have the space) to do a fiberglass version.
So I needed an alternative material that didn't involve using toxic chemicals near where I sleep. I decided to give it a try with paper mache. I've had quite a bit of experience making large and ridiculous things out of paper mache, and have gotten pretty good at it. I was pretty confident that with enough layers, I could make the dome strong and smooth enough, and that it would at least work as a temporary solution until I work up the nerve (and have the space) to do a fiberglass version.
 |
| two copies of LA Weekly |
 |
| a light coat of watered down spackling paste, and then sanded |
 |
| a coat of Elmer's Wood Glue |
 |
| a hole cut to run the eye stalk through |
Tuesday, January 24, 2012
The Dome Mould
Here's how I made the mould for the dome. I started by drawing out a template for the shape and arc of the dome from the Dalek plans.
I cut out the dome shape from the posterboard. Then I measured out the number and sizes of plywood discs I would need to cut to build up the structure of the mould.
I cut discs out of plywood and glued them together to get pretty close to the shape it is supposed to be and then mounted them on a plywood plank with a screw in the middle so I could rotate it.
I mounted a piece of MDF with half of the dome arc cut into it on the side.
The I used spackling paste to fill out the rest of the shape of dome. As I spun the plywood disc part, the board on the side would scrape away the excess paste, leaving the correct shape of the dome behind.
I let it dry out for a few days, then lightly sanded it to smooth it out a bit more and then gave it a coat of paint.
Saturday, January 21, 2012
The Neck Rings
Since I didn't have a any good way of cutting the rings out of single pieces of plywood or MDF at the right thickness (nevermind routing a 45 degree angle on the outside of each), I had to come up with an alternative method.
I decided to build them up in layers of thin MDF and foam core board. This also had the advantage of making them much lighter than plywood or solid MDF would have been.
I solved the 45 degree angled edge problem by making the top layer of each ring the diameter it would have been had I cut the angle in later. I then filled the space with spackling paste, and painted them.
I made the MK1 clover shaped struts by gluing together 3 1/4" wooden dowls and painting them silver.
Friday, January 20, 2012
Dome Lights
I started with the same kind of parts I used for the eye light. Instead of blue, I used two white LED's mounted in bolts and ran those through burnt out tea light holders. I used ping pong balls for the covers, since that's what the originals looked like. Rather than the dimmer switch I used for the eye light, I connected an on/off switch that I'll mount somewhere inside so the Dalek operator can make the lights blink while it speaks.
Saturday, November 12, 2011
Got a Dalek Eye On Me
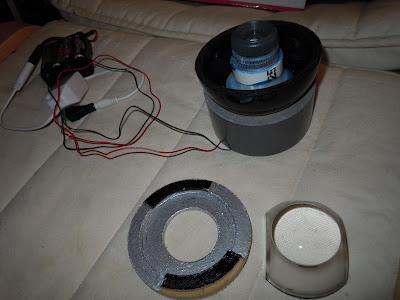
I decided to take a little artistic license with my Dalek's eye. The originals appear to have only a white disc in the middle, except for one, which had a working iris made from a camera lens. I really like the glowing blue eye of the 2005-2010 New Series Daleks, so I decided to give it one of those instead. It's easier to wire than trying to get a camera lens iris to work, and it just looks way cooler. So why not?
I used a 1" diameter length of PVC pipe for the Eye Stalk. Technically, I should have used a wood dowel and trimmed it down to get narrower at the front, but again decided to take a bit of that artistic license here too. I needed the inside to be hollow to run the LED for the eyeball through.
For the hinge bit at the back, I took some MDF disc cut-outs from the skirt panels and sandwiched them together to the right thickness and ran the PVC pipe through it. The back end of the pipe will attach to the eye stalk control mechanism (which I have yet to build.)
Since powder blue Perspex isn't really available anymore, I cut the discs for the eye stalk out of MDF, coated them with wood glue to make them plastic-y, and then painted them the same color blue I used for the hemispheres on the skirt. Somehow I managed to make the center holes in them exactly the right width so I could slide them onto the silver painted PVC, yet still be snug enough in fit that they stay in place. I went with the MK3 Dalek disc pattern and spacing (as well as eye stalk length) again, just because I like it better.
I used another Magic 8 Ball for the eye ball. I started by draining the liquid from it (this time being more careful not to stain my fingers blue). The I sawed it in half to remove the insides, since this one didn't need to remain spherical to act as a ball joint, and I was going to have to trim parts of the front away.
Once all that was done, I used parts of the 8 Ball "guts" to mount the LED in the center. The LED I used is a wired "bolt" style - it's a 10mm LED built into what looks like a large machine screw, with a nut on the back. I think it's meant to be used for automotive purposes - ie, "pimping" one's "ride".
Next I mounted a couple of magnifying lenses above the LED to make the light bigger and distort it a bit. These were from Staples - meant for examining your stamp collection or whatnot. These were attached with MDF discs and bits i cut and glued together to hold everything in place. I painted the inside silver, hoping it would reflect and distort the blue light from the LED a little more, giving it a nice atomic Dalek glow.
I also attached a dimmer knob between the battery pack and the LED, so the operator can change the intensity of the light - just a little thing that might make it look more "alive".
Wednesday, November 2, 2011
The Neck-bin
Here's the inside part of the Dalek neck. I used charcoal colored "supersolar" fibreglass mesh (meant for screen doors and such) for the outside. It shoud allow the Dalek operator to see out, while being hidden from view.
Subscribe to:
Posts (Atom)


